This weekend was the first official (by my terms) weekend of spring. The weather was beautiful, with no rain and temps in the 70s and 80. I had nothing planned. The weekend agenda was wide open. And, we were home. Unlike some weekends, we were not travelling. So, it was project time.
First up was the yard. With spring time here, everything green is growing like crazy. The bush in the front yard is no exception. Last weekend I looked out and saw a little new growth, and though about how healthy it was for the plant. This weekend, I looked out and saw what was once a well manicured bush had grown like one of those sponge toys you tossed into water as a kid and watched it grow to 700% it’s original size. To me, this was a perfect opportunity to break out a power tool. So, the battery powered electric trimmers (aka, the finger removers) came out and the bush in the front yard went on a weight loss program that Jillian Michaels would be proud of.
My front yard, as well as part of my backyard, has been invaded by bermudagrass. While this stuff is great on a golf course, it is a horrible, horrible, horrible weed when found in a lawn. It will invade and crowd out every other grass, flower, bush, mulched area, etc. It just takes over. So, this year I am waging war with the bermudagrass. It started by dethatching the yard. Now, I could have gone out and purchased a thatching rake and gone over the yard that way, but what fun is that. Instead, I rented a power-seeder / rake and went to work. It did a great job of bringing up the thatch that was suffocating my yard. A quick pass with a garden rake and I had several piles of dead grass and leaves, forever removed from my yard. It also did an excellent job of cutting up the majority of the bermudagrass stolons. While this wont kill anything, it should slow the spread of the weed in preparation for an upcoming selective herbicide attack.
With the ground opened up, it was a great chance to fertilize. Given that I also have a broadleaf weed problem (dandelions, etc), I opted for a fertilizer that also contained 2,4D. The cool early morning air brought with it a thick layer of dew on the grass, perfect for applying the fertilizer / herbicide mixture. My normal method of spreading fertilizer – driving the lawn tractor haphazardly at full speed with a pull behind spreader – would not have provided the control needed to keep the herbicide off of the flowers and other plants we have in the mulch. So, I borrowed a walk behind spreader from a buddy and began my march across the yard. Many 3′ strips later, the yard was fertlized and the weeds were one their way out.
Heading inside to clean up, I next encountered the 5 gallons of beer – a Chocolate Oatmeal Stout – that had been patiently waiting for me on the kitchen counter. Placed there several days ago to settle out the remaining particulates, it was now ready to bottle. So, Sat morning became bottling day. Either it had been too long since my last batch of beer was bottled, or I had had too many beers between then and now, but I forgot how long of a process it was to clean, sanitize and fill all 47 (in this case) bottles of beer. A few hours later, I had a new batch of beer in bottles and it was lunch time.
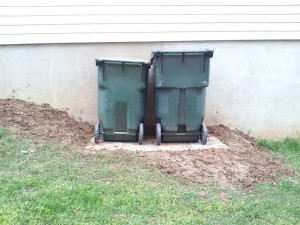
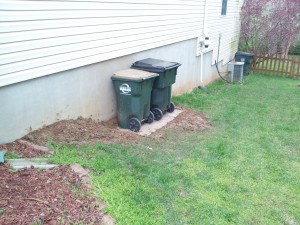
Next up, was a little more work on the yard. For the years that we’ve lived here, the only place we’ve had to store the trash cans was the muddy spot on the side of the house that was semi-flat. Actually, semi-flat was being generous. So, while on a trip to The Home Depot (where you can purchase many wonderful GE Appliances, including the dishwashers that I help design… shameless plug from a GE employee) with the ladies to pick up paint, I decided it was time to remedy the downhill sloped trash can landing blues. Little did I know, what I thought would be a 10 minute project turned into a Civil Engineering senior design project. I knew the area where we kept the cans was a “little” out of level, I didn’t realize that a backhoe would have been a more appropriate tool than a shovel for the excavation. A little work with a shovel and a level, some pre-poured pavers and a lot of dirt later, we had a new spot to park the trash cans. It is now level (well… sloped ever so slightly away from the house) and free from mud. The good part about having to dig down to make a level surface is that I needed the dirt to guide water away from the house and build up the area around the new landing. The finished product is a big improvement over what we had.
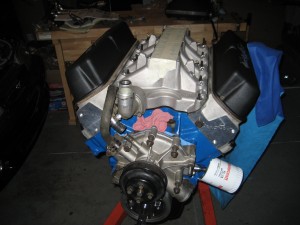
With the work around the house “done” (or maybe I was done working on the house, either way…), I turned my attention to the garage. My poor Mustang has been waiting for a new motor for some time now. With a baby on the way, I have a renewed interest in getting the car back together. So, I spent some time working on the valve train. Unfortunately, I have three lifters that are damaged to the point they will not go in the bores in the block. So I can’t say that my valve train is completely assembled, but I did finish off adjusting what I could. Having initially just tightened parts down, thinking this would be simple, I quickly found out that my heads of choice (Trick Flow Twisted Wedge) were a little particular as far as valve train geometry when placed on a Ford small block. So, valve by valve, I adjusted pushrod guide plates until each rocker sat correctly atop its valve. I adjusted the lash and set the preload at each location. Once the remaining lifters arrive, I’ll finish it off and seal up the valve covers and lower intake.
With the completion of the Mustang in sight, there is a chance that the garage might actually be used to park cars some day. For that to happen, the rest of the junk that is filling the garage will have to find a new home. So, I started plans for a garden shed. The first part was to find a spot in the yard to put a shed. The goal is to build an 8’x12′ shed. Working with a tape measure and some sticks to mark corners, I was able to pinpoint two locations that would accommodate a shed this size without being overly intrusive into the backyard. Unfortunately, both options involve alterations to the fence. But it shouldn’t be too much work. With my location(s) picked out, I was on a mission to find a cost effective way to purchase a shed. This trip took me to Lowes (where you can also buy wonderful GE appliances…). After the trip to THD on the previous day, I found simple little pre-fabed garden sheds to be way over priced. The trip to Lowes only reaffirmed this. So, I started to draw up plans to build my own. But, I couldn’t visit a hardware store without at least looking around. So I headed inside.
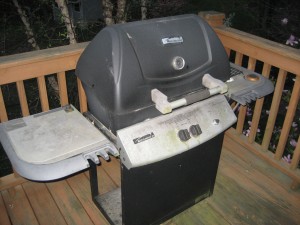
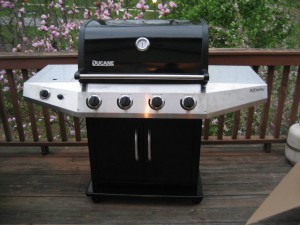
For the last two years, I’ve been researching gas grills. What I found was that gas grills were massively overpriced and poorly constructed. So, I’ve held off on my purchase. But, for some reason, I found myself again in the gas grill area, looking at my options. Much to my surprise, I found a grill that I previously considered massively overpriced that was now only moderately overpriced. A year or two ago, I had looked at a Ducane grill. The reason being that they were well built and used quality materials. Well, Weber has now bought Ducane, and moved its manufacturing to China. This allowed them to drop the price to where a model could be sold in a big box retailer, in this case Lowes. I was a little skeptical, but looking over the construction and checking the burner material (200 series stainless), I was surprised to see the grill that I wanted last year had a side burner added to it and had the price dropped nearly $100. So, on a splurge, I became the new owner of a Ducane gas grill. Not that we were not due for a new grill. Ol’ Smokey – the Kenmore grill that I purchased 7 years ago – had seen better days. The heat deflectors were long ago lost to rusty ruins and this year the burner had degraded into more of a random flame thrower than a controlled grilling device. But this was a splurge purchase nonetheless. I brought it home and in 45 minutes what was once a box of random parts became my newest love. Upon the first lighting, I realized that I had waited way too long to replace Ol’ Smokey with a quality grill that complemented my love of outdoor cooking. So, the splurge was justified, and I am more than happy with my newest toy.
And with that, my weekend projects were over. Time to relax and get ready for another work week. The to-do list is a little shorter, and our little home is a little nicer. Its amazing what a little nice weekend weather will let you accomplish.



One Response to Weekend Activities (25Mar12)